Getting Started
Variables is a Unity asset that let's you create and use global variables that are accessible from anywhere in Unity. This guide will walk you through how to add the Variables asset to a Unity project.
1. Create an Empty Project
Create a new Unity project. It doesn't matter what type of project you create. This asset consists of scripts mainly and is compatible with any render pipeline.
2. Import the Variables asset into a the Project
- Get the asset from Unity Asset Store.
- Import Variables into your Unity project.
Unity 2020 and Newer
In recent versions of the Unity Editor, the Asset Store window is gone. You need to import assets from the package manager window.
- Open the package manager window from the window -> package manager menu.
- Find No Such Studio: Variables and click Install, then Import.
Unity 2019 and older
In older versions of Unity Editor, you can import the asset through the Asset Store window.
- Open the Asset Store window either by pressing ctrl+9 or from the window -> asset store menu.
- Find No Such Studio: Variables and click Install, then Import.
This step adds the Variables asset under Assets/NoSuchStudio folder. You are all set to use the asset in your project!
3. JSON Support for Unity 2019 and older
This step is optional. By adding these additional packages, you get to use more features No Such Studio: Variables as explained here.
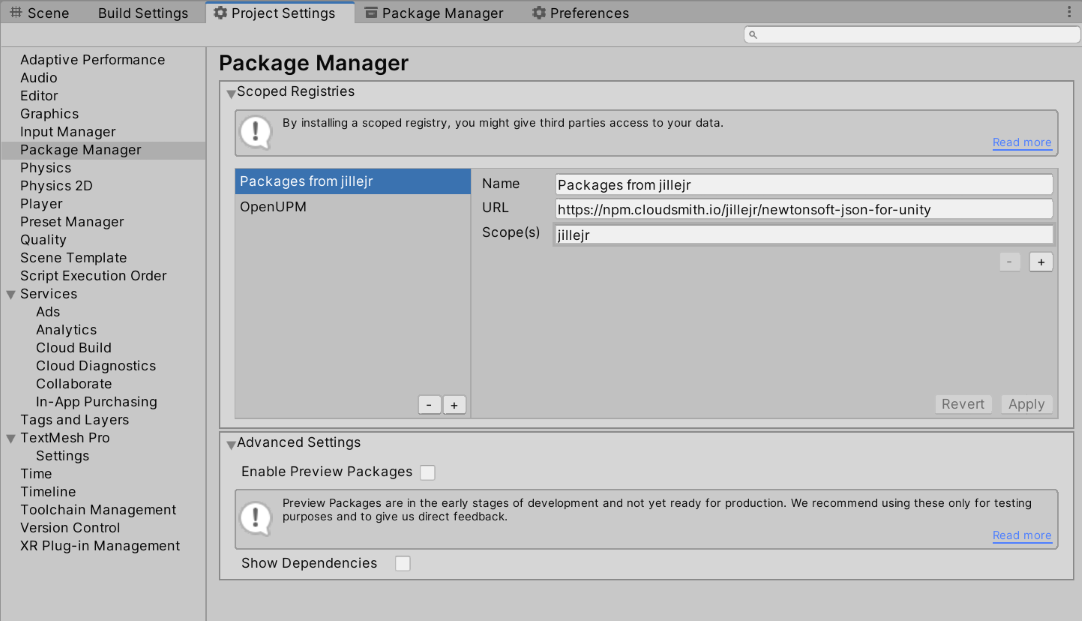
These packages are hosted on 3rd party repositories. You need to add these repositories to Unity's UPM:
- Open the Project Settings window
- Go to the Package Manager tab
- Add these two repositories.
| Repository Name | URL | Scope |
|---|---|---|
| Packages from jillejr | https://npm.cloudsmith.io/jillejr/newtonsoft-json-for-unity | jillejr |
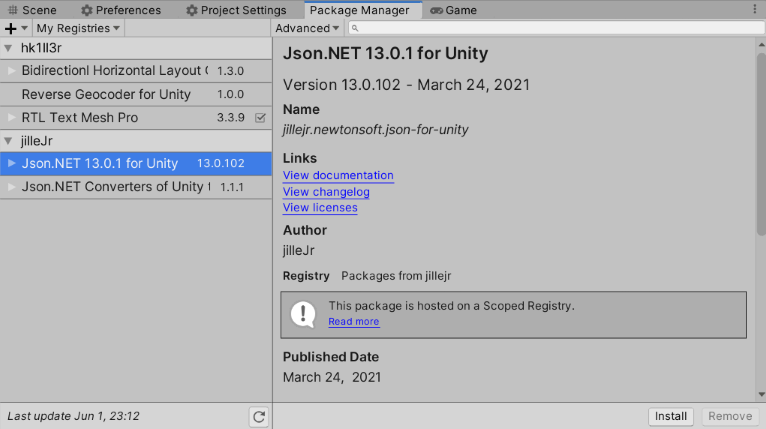
No Such Studio: Variables uses NewtonSoft JSON package when it is present. The following featuers depend on it:
- Typed variables
In Unity 2020 and newer the package is included by default. In 2019 and older you can add the following package to use these features.
4. Exploring the Demo Scenes
The demo scenes are a great resource for learning how to use this asset from examples.
Load the first demo scene from Assets/NoSuchStudio/Variables/Examples/Scenes/BubbleBurstGame by double clicking it.
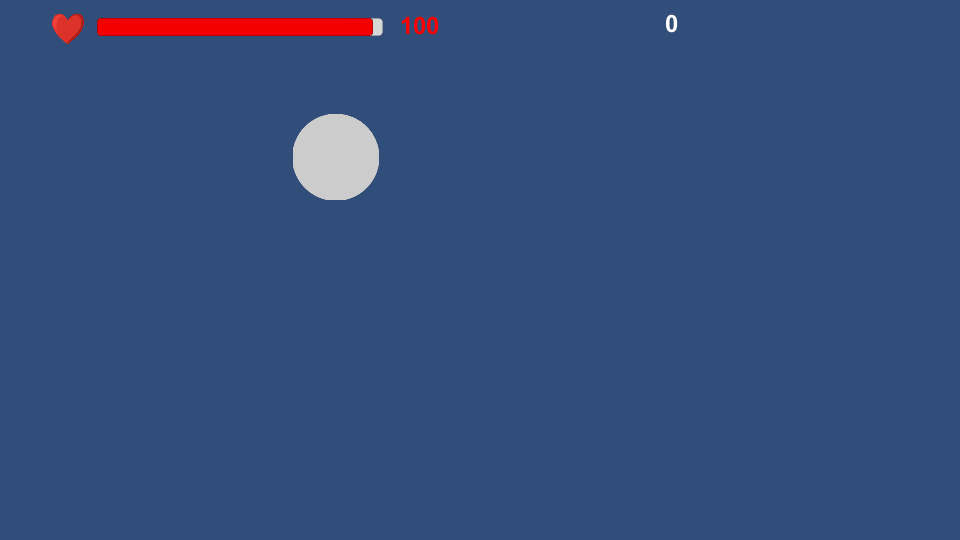
Run the scene to see the game in action! The bubbles pop at random locations on the screen and the player has to click them quickly. Each bubble that is not burst in time reduces the player's health. The game ends when the player's health is 0.
Let's look at the important components of this scene:
VariablesServicecomponent (on NoSuchStudio GameObject) This component is the central part of the Variables system. It keeps track of all the Variables that are present in the scene and monitors their changes. Each scene that uses the Variables system should contain a single instance of this components. In a multi-scene game it makes sense to set the GameObject that has theVariablesServicecomponent (DontDestroyOnLoad)[];VariablesSourcecomponent (on NoSuchStudio GameObject) The pre-madeVariablesSourcecomponent is a simple store for declaring variables. You can add / remove and edit variables from the Inspector window for this component. For this simple scene, there are 3 variables defined: "hp", "score" and "highscore". Note how by modifying the variables and their values here, they also change on theVariablesServicecomponent.VariablesListenercomponent (on GameManager GameObject) This component monitors certain variables for changes and invokes a callback whenever any of those variables change. This way you can decouple the logic that changes a value from the logic for reacting to that change. For example in this game theEnemy.csscript adds to the user score whenever a bubble is clicked. The HUD UI updates the user score in a callback from that change.GameManagerandEnemycomponents These two components implement the game logic. They interact with theVariablessystem through static calls to@"VariablesService.SetVariable"and@"VariablesService.GetVariable".