Getting Started
No Such Studio: Localization is a Unity asset that let's you localize your game for different languages. It is easy to setup, use and extend. There are localizers included for Sprites, Text, Audio Clips and you can easily extend the asset by writing new component localizers and translation sources.
This guide will get you started on the asset. I have also created a series of tutorials on youtube to help ramp you up. You can check out the videos here.
In this guide we are going to add No Such Studio: Localization to a new Unity project and explore the Demo scenes that are included with the asset. The demo scenes are a great resource for learning from examples.
1. Create an Empty Project
Create a new Unity project. It doesn't matter what type of project you create. This asset consists of scripts mainly and is compatible with any render pipeline.
2. Add the Localization asset to the Project
You can download and import the asset like any other asset from the Unity asset store.
Unity 2020 and newer
In recent versions of the Unity Editor, the Asset Store window is gone. You need to import assets from the package manager window.
- Open the package manager window from the window -> package manager menu.
- Find No Such Studio: Localization and click Install, then Import.

Unity 2019 and older
In older versions of Unity Editor, you can import the asset through the Asset Store window.
- In Editor open the asset store window. (shortcut ctrl + 9)
- Search for "No Such Studio: Localization". There is a Lite and a Pro version. Check out the home page to learn more about the differences between the two version.
- Press "Import", then "Ok".
This step adds the No Such Studio: Localization asset under Assets/NoSuchStudio folder. You are all set to use the asset in your project!
3. Add Additional Packages
This step is optional. By adding these additional packages, you get to use more features No Such Studio: Localization as explained here.
These packages are hosted on 3rd party repositories. You need to add these repositories to Unity's UPM:
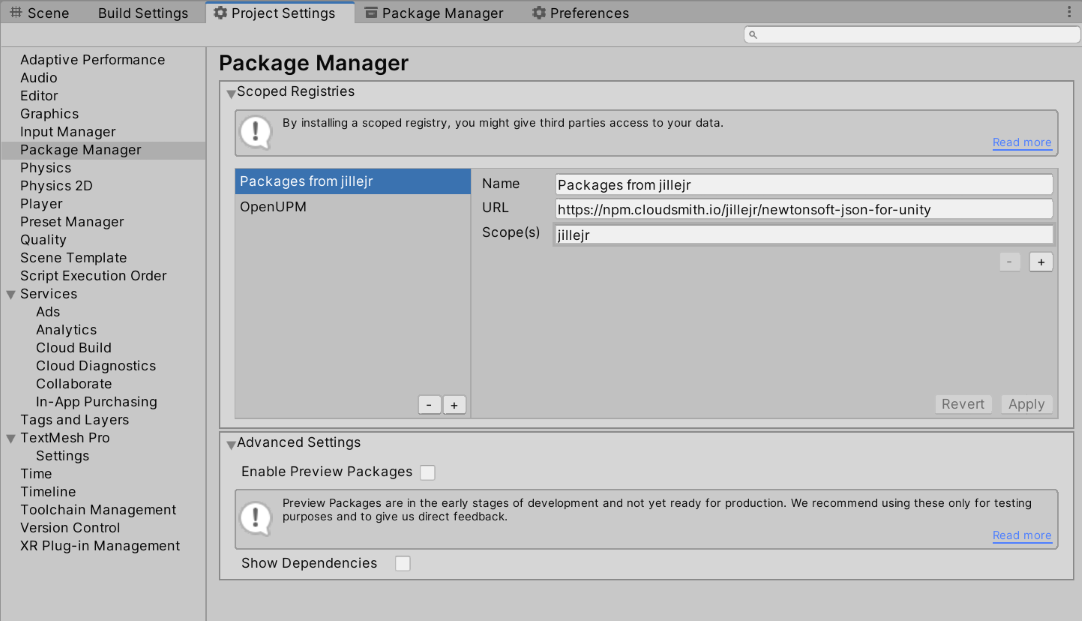
- Open the Project Settings window
- Go to the Package Manager tab
- Add these two repositories.
| Repository Name | URL | Scope |
|---|---|---|
| OpenUPM | https://package.openupm.com | com.nosuchstudio |
| Packages from jillejr | https://npm.cloudsmith.io/jillejr/newtonsoft-json-for-unity | jillejr |

3.1 RTL Text Support
To use the RTL languages with Unity UI, add the following package.

3.2 RTL Layout Support for Unity 2019 and older
Unity 2020 and newer support both LTR and RTL layout with the Horizontal Layout Group component. For Unity 2019 and older, you can add this package to add RTL layout support.

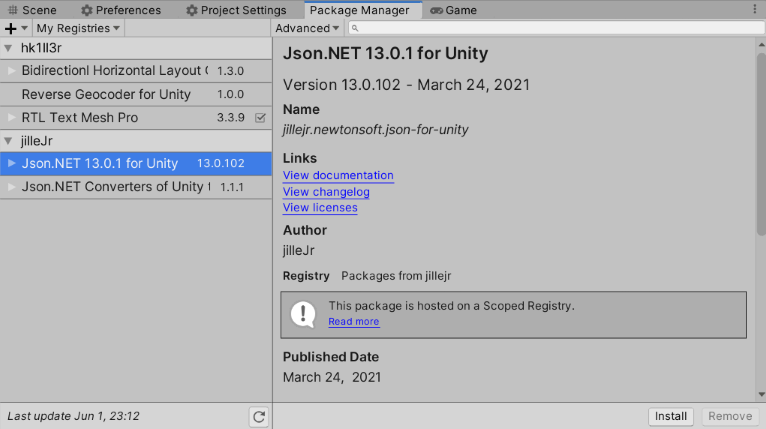
3.2 JSON Support for Unity 2019 and older
No Such Studio: Localization uses NewtonSoft JSON package when it is present. The following featuers depend on it:
- Typed variables
- Custom locales
- JSON translation source
In Unity 2020 and newer the package is included by default. In 2019 and older you can add the following package to use these features.
4. Explore the Demo Scenes
Add all the scenes to the Build Settings of your project.
Run the first scene named "0-SceneSelection". You can choose the demo scenes at runtime and by pressing the back button you'll go back to the scene selection page.
Note
The demo scenes depend on the additional packages from section 3. If you have not included all those packages, some scenes will not work properly.
Each scene has:
- A "Services" object which contains the singleton services.
- A "LocalizationSource" that contains all the translations for the scene.
- Buttons with country flags that change the language.
- Localizer Components that respond to language changes.
Take a few minutes to notice everything that changes when you switch the language, sprites, audio clips, layout direction and text.
Now exit the play mode and select the Services object in your scene.
- Notice that by toggling the
Localization Servicecomponent, the service goes online and offline in all the localizer components in the scene. - While the
Localization Serviceis enabled, change the "Current Locale" field to another language. Notice that even in edit mode the language change takes effect.
See Also
- To get better understanding of the asset and how to use it, take a look at the Overview page.
- If you need to localize components that are not handled by the pre-made localizer components, you need to implement new localizer components. See Extend No Such Localization page to learn how.